Learn how to create, develop, and deploy a Next.js app using Sealos DevBox. This guide covers project setup, remote development with Cursor IDE, and cloud deployment.
Sealos DevBox is an all-in-one platform designed for integrated online development, testing, and production. It offers a seamless solution for creating environments and database dependencies with just a single click, allows developers to work locally using their preferred IDEs while streamlining setup processes and enabling automatic application deployment.
In this guide We'll demonstrate how to how to create a minimal Next.js demo project with Sealos Devbox.
Create a Devbox Project
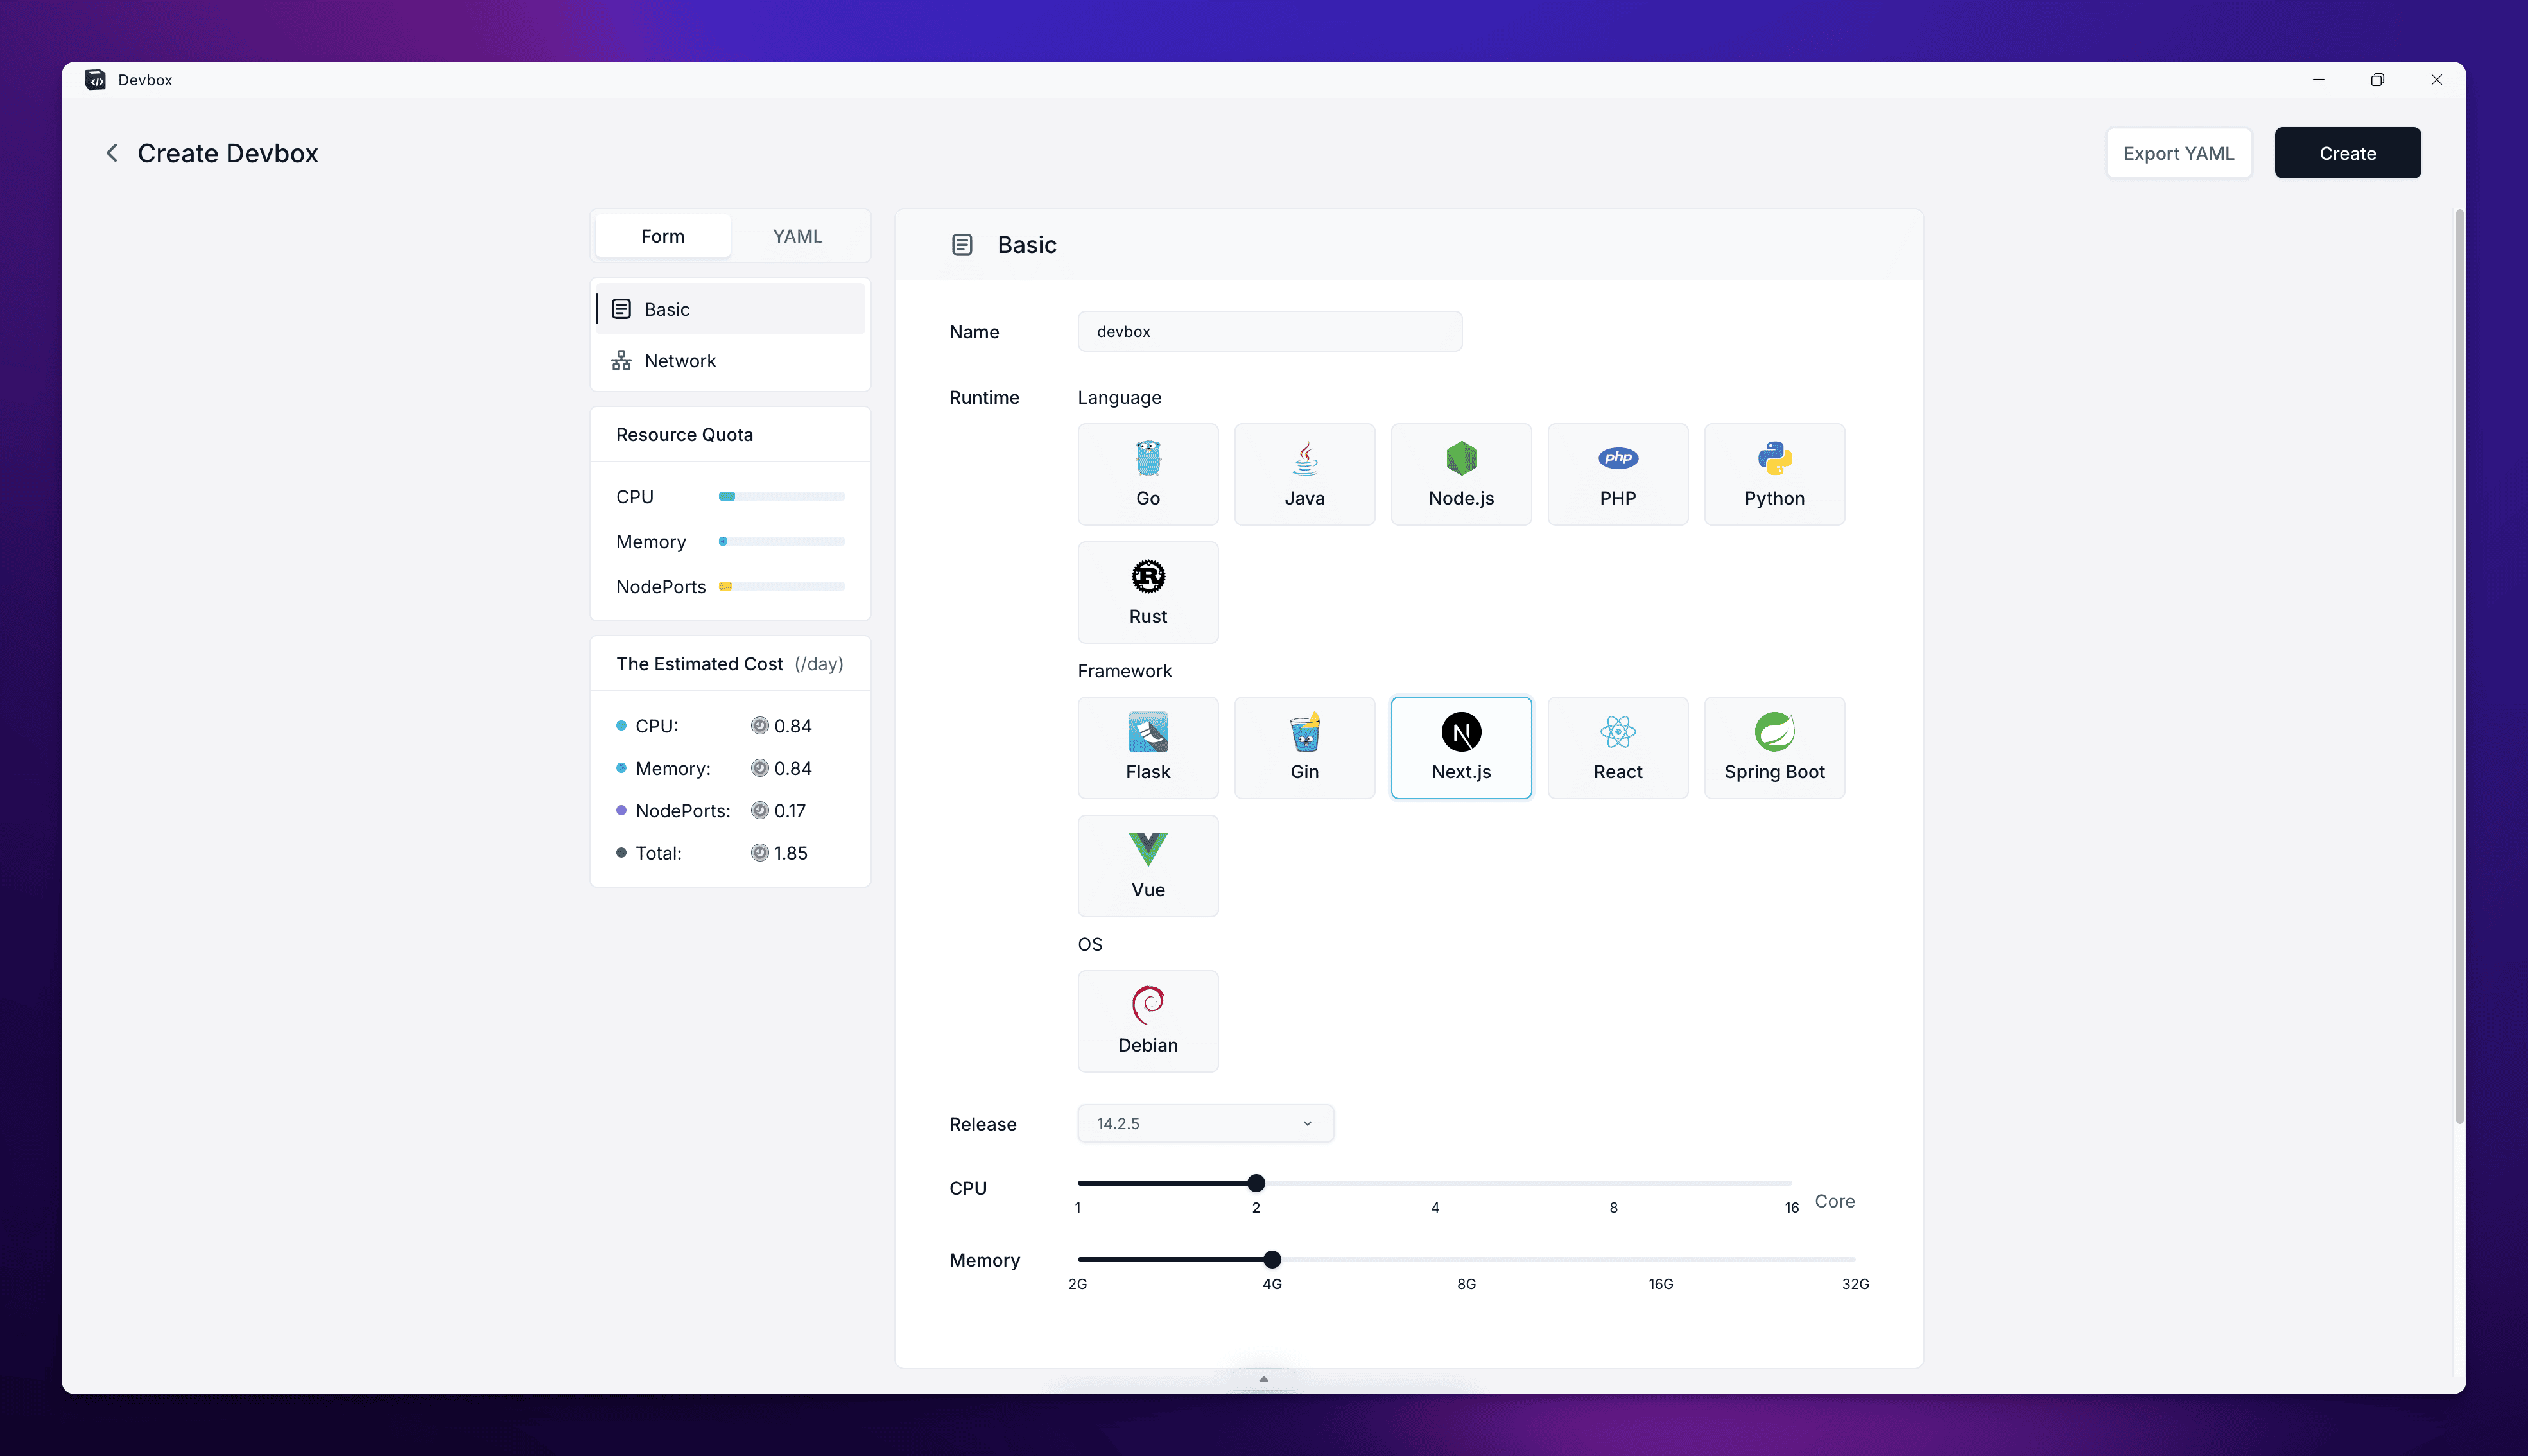
Click on the "Devbox" icon on Sealos Desktop, then click on the "Create New Project" button to create a new project.
In the "Runtime" section, choose "Next.js" as the development framework. Use the sliders to set the CPU cores and memory for the project.
- After setting up the basic environment, you'll need to configure the network settings for your project:
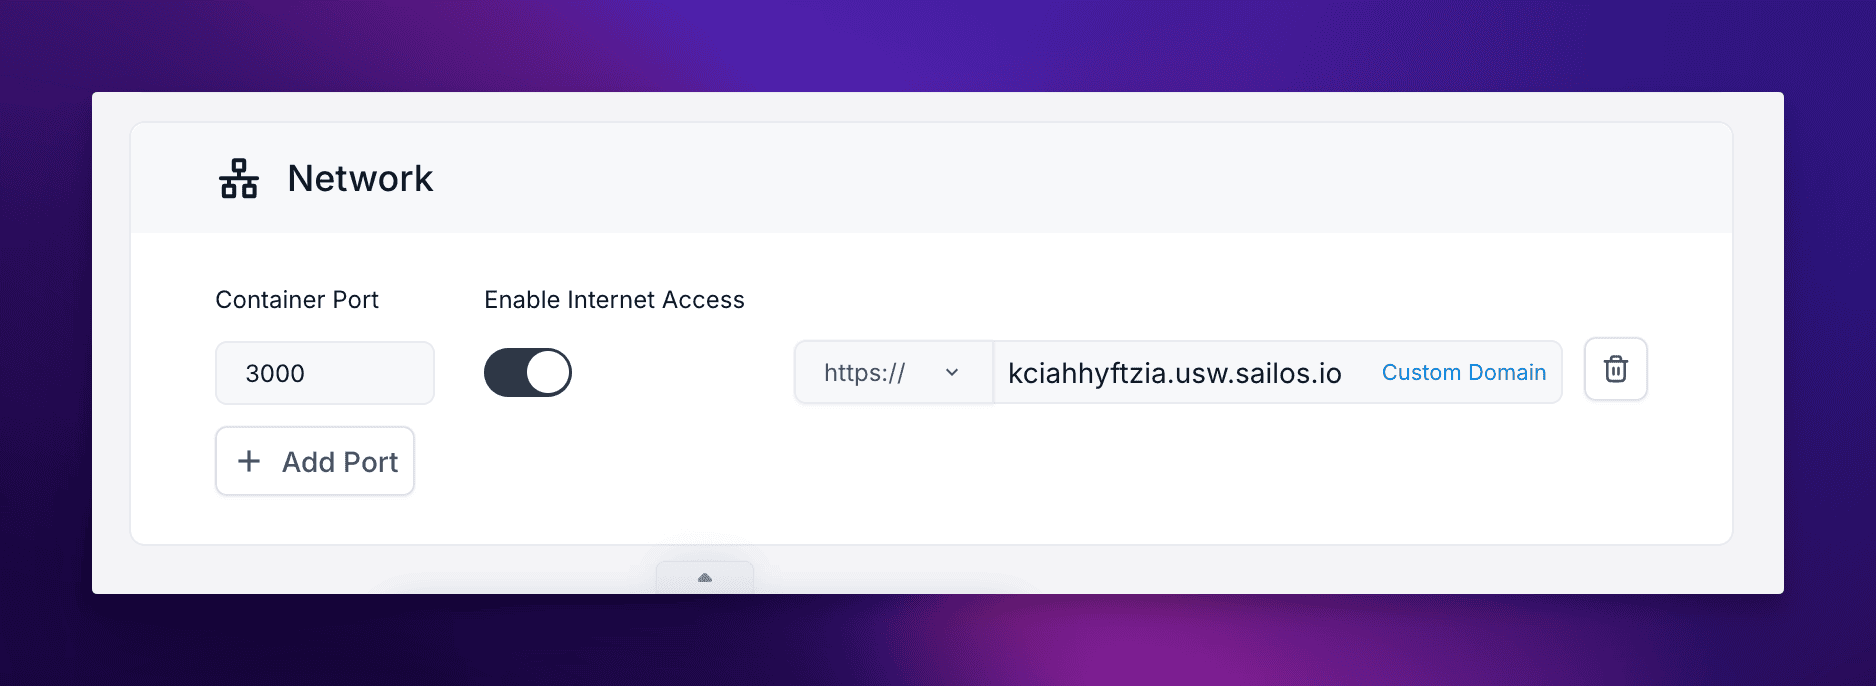
Scroll down to the "Network" section of the configuration page.
Container Port:
- Enter "3000" in the Container Port field. This is the default port that Next.js uses for development.
- If you need additional ports, click the "Add Port" button and specify them.
Enable Internet Access:
- Toggle the switch to enable internet access for your Devbox. This allows external users to access your Next.js application through the public internet using the provided domain.
Domain:
- By default, Sealos provides a subdomain for your application.
- If you want to use a custom domain, click on "Custom Domain" and follow the instructions to set it up.
\ Remember that the container port (3000) should match the port your Next.js application is configured to run on. If you change the port in your Next.js configuration, make sure to update it here as well.